
This being one of our larger productions—but not the largest by far—we thought we'd give you a peek into what went into building this creation. We know that a lot of our stuff is in a Black Box but decided that this time we could crack the lid a little.
As you read in the previous post, we begin all of our commissions with a detailed, full scale 3D engineering model. This allows us to fully realize the design before commencing construction, know what it's going to look like, and it affords a complete set of high resolution dimensioned parts that can be separated out and built that we know will fit. (I don't like surprises.)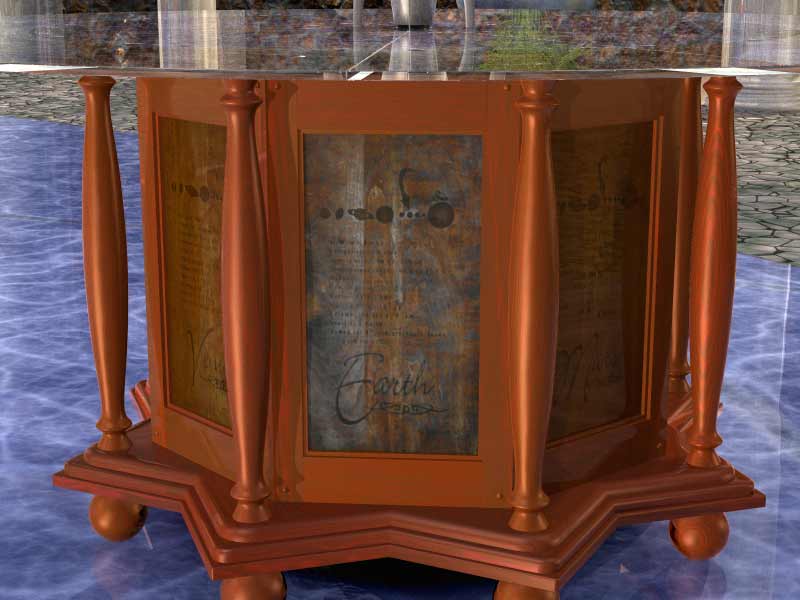
High Resolution, High Fidelity 3D Design Model
From this model, came the first parts to be crafted; the turned legs and globe feet.
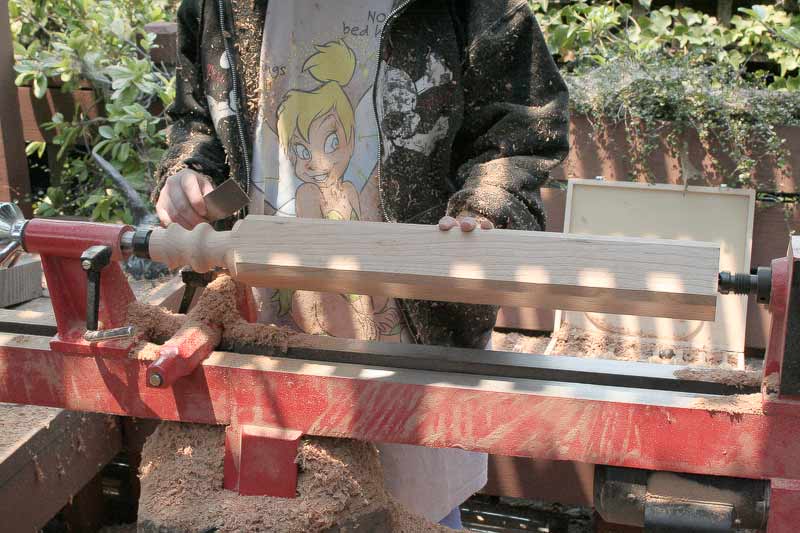
 Joy took this file, printed it our on our 44" printer and took that to the wood lathe to glean the shape. She is starting with a 4x4 block of solid cherry wood, four feet long. Using calipers, the dimensions at stations along the length are transferred to the wood by cutting thin channels down to the depth that the calipers indicate.
One End is Fully Shaped, While the Remainder is Untouched

Station Diameters are Cut
Once the stations are cut to their target diameters, all of the wood outside of those diameters can be removed. The essential concept in any sculpting: take away everything that is not the object. As the stations diameters are approached, care is taken to not go too far, too fast. Blending one diameter to the next reveals the desired shape, and it must be done carefully. Once it's gone; it's gone. When the material removal is complete and the turning is a graceful transition from station to station, with no station cuts visible any longer, the surface is sanded then oiled and stained using fine steel wool, while turning on the lathe. This brings the finish to a nice lustre.
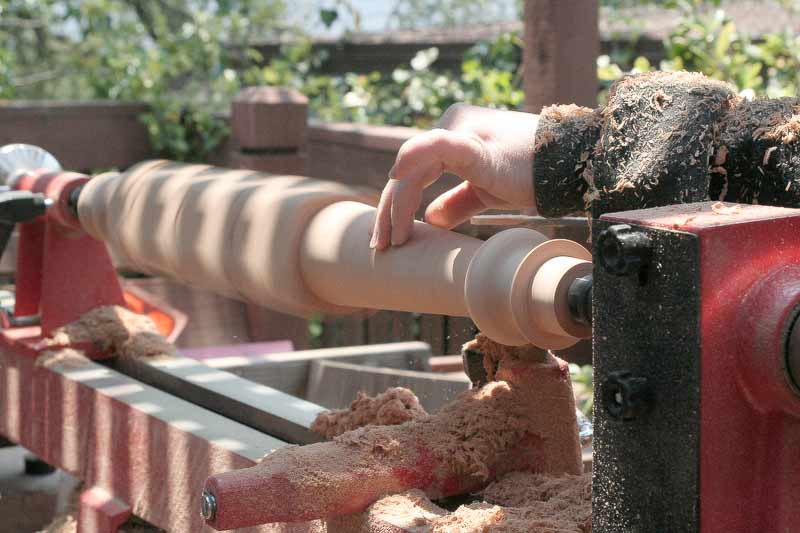
The Shape Begins to Emerge
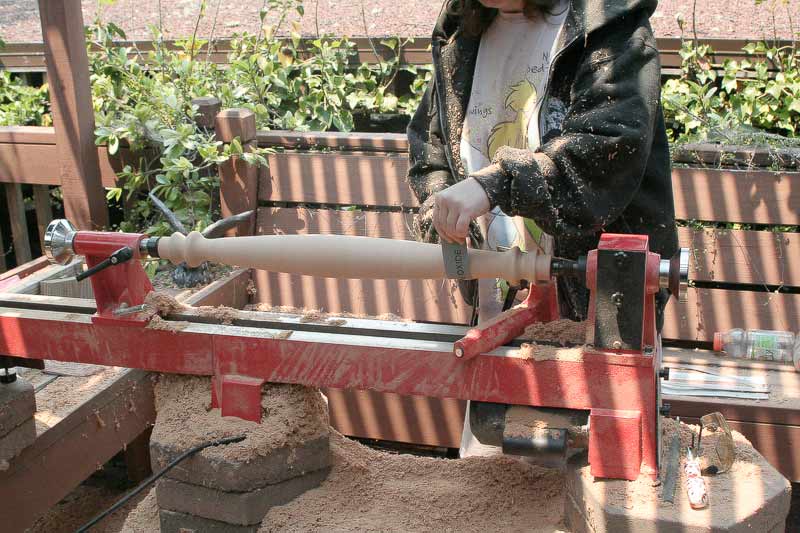
Sanding the Finished Turning
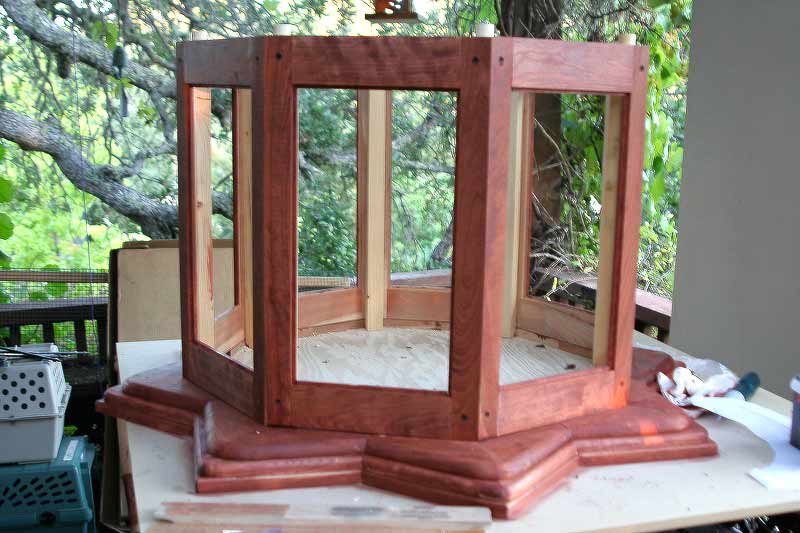
Here are the complete set of components that make up the cabinet, with the addition of the center base plate (not seen) that is the core of the compass rose section: eight turned legs, six of the globe feet (with two blocks that will become #'s 7 and 8), three layer eight point compass rose base, paneled doors in a stack and the octagon top plate just visible beyond at the top of the frame. To the right, exhibiting its initial stain coat, the parts are coming together. The compass rose base has been laminated, trapping the base plate between the three layers to form the floor that will hold the CPU and drive mechanism. Doors, sans panels, have been miter-edged to fit seamlessly together at the corners and are temporarily assembled to the inner frame; forming the central cabinet enclosure.
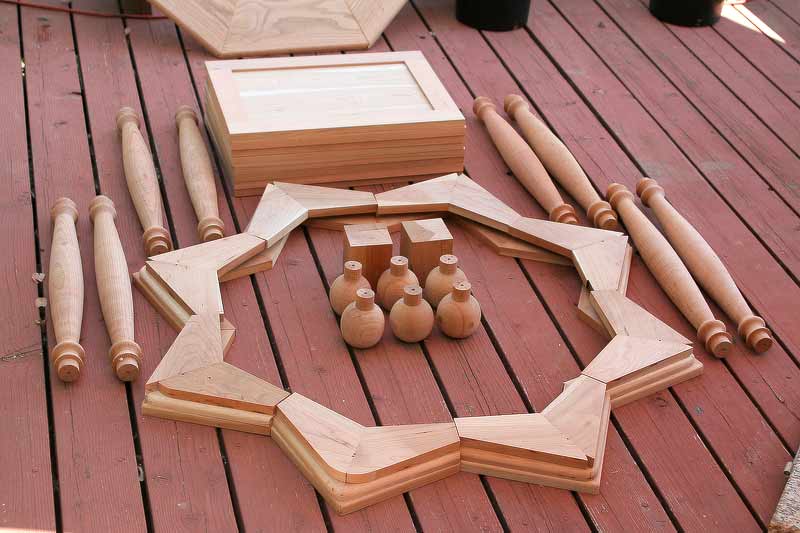
It's an Octagon Cabinet Kit!
Compass Rose Base and Doors
The rocket was turned out of solid cherry wood in much the same manner as the legs. You can read about it in three short posts on Joy's Blog. Once it was ready and the tubes had been assembled to their respective rotating sections, it was time for a test fit of the rocket assembly to the cabinet.

Test Fit of All Components Prior to Gluing
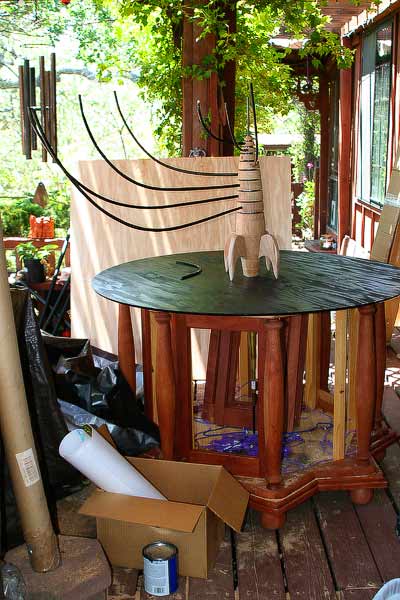
Test Fit of Rocket Assembly to the Completed Cabinet
At this point, the carbon fiber arms are not fixed to the rocket sections; that will take place during final installation. We're just seeing how it looks. Gotta stop and smell the roses, you know.
With a project as intense as this one, compounded by an ornery and clueless middle manager with an agenda who never should have become involved in the first place, one does have to stop and reflect upon what is really important along the way and just look at what is going on right in front of one's eyes. Otherwise, you end up down a rabbit hole looking up at the sky, gasping for air. That's no place from which to create. Taking time to step back and see, even though it is you who has been actually doing this, reveals much more than you might think. Kind of a "can't see the forest for the trees" thing. Also keeps you sane, well, as sane as a Renaissance Person can be... Next, we'll turn to the Glass side of things. For more on the orrery visit: Celestial Gears Like it? Hate it? Wanna see more? Let us know. Post a comment and share your thoughts.Tags: 3D model, astronomy, cabinetry, wood carving, wood turning, woodworking
Short URL for this post: //spherical.org/s/j


 RSS - Posts